Custom Packaging For Your Businesses

Increasing sales growth via quality packaging is quickly becoming a priority for many businesses big and small, however, it is true that this is more important for smaller brands that are trying to accelerate brand recognition by using attractive custom packaging. More and more, we see our clients invest in custom boxes, packaging sleeves, custom labels, and even personalized inserts to elevate their customer’s experiences.

Surveys and studies will tell you one thing — branded packaging brings big value for your business. But just to give you an idea:

  • 72% of American consumers say that packaging design influences their purchasing decision. (Ipsos)

  • 71% of American consumers say they are more likely to buy products in paper or cardboard packaging. (Ipsos)

  • 60% of online shoppers say that branded or gift-like packaging gets them excited about receiving the package. (Dotcom Distribution)

  • 50% of online shoppers say they are more likely to recommend products to friends if they came in branded or gift-like packaging. (Dotcom Distribution)

According to a study by Statista, a leading provider of market and consumer data, e-commerce growth is projected to hit a whopping 6.54 trillion US dollars in 2022. With the market growing, we can expect more brands to further saturate different industries; and with that, there will be a pressing need for you to stand out from the rest.

This where branded packaging comes into play, and here are effective ways small businesses are making sure they stay on top of their packaging game.


Customize Your Design With Your Brand in Mind

Branded packaging encourages the customer to remember you after their purchase. Well-planned and executed packaging design can turn first-time buyers into repeat customers, and if your packaging design resonates with them, they will become your brand advocates, too.

Taking your product packaging to the next level does not mean you need to have custom shipping boxes. There are factors to consider, such as your product itself not needing it, or your price point now allowing the increase in cost.

Don’t worry - you can make small and meaningful investments into upgrading your product packaging.

Read more about How Can Branding Costs Be Capitalized

Custom Packing Tape

By far the most budget friendly option, the personalized packing tape option is the best option for growing businesses. Besides being a cost-effective way to customize your packages, it can also be an opportunity to include a discount code or more information about your brand as well as advertise any additional items available in your shop.

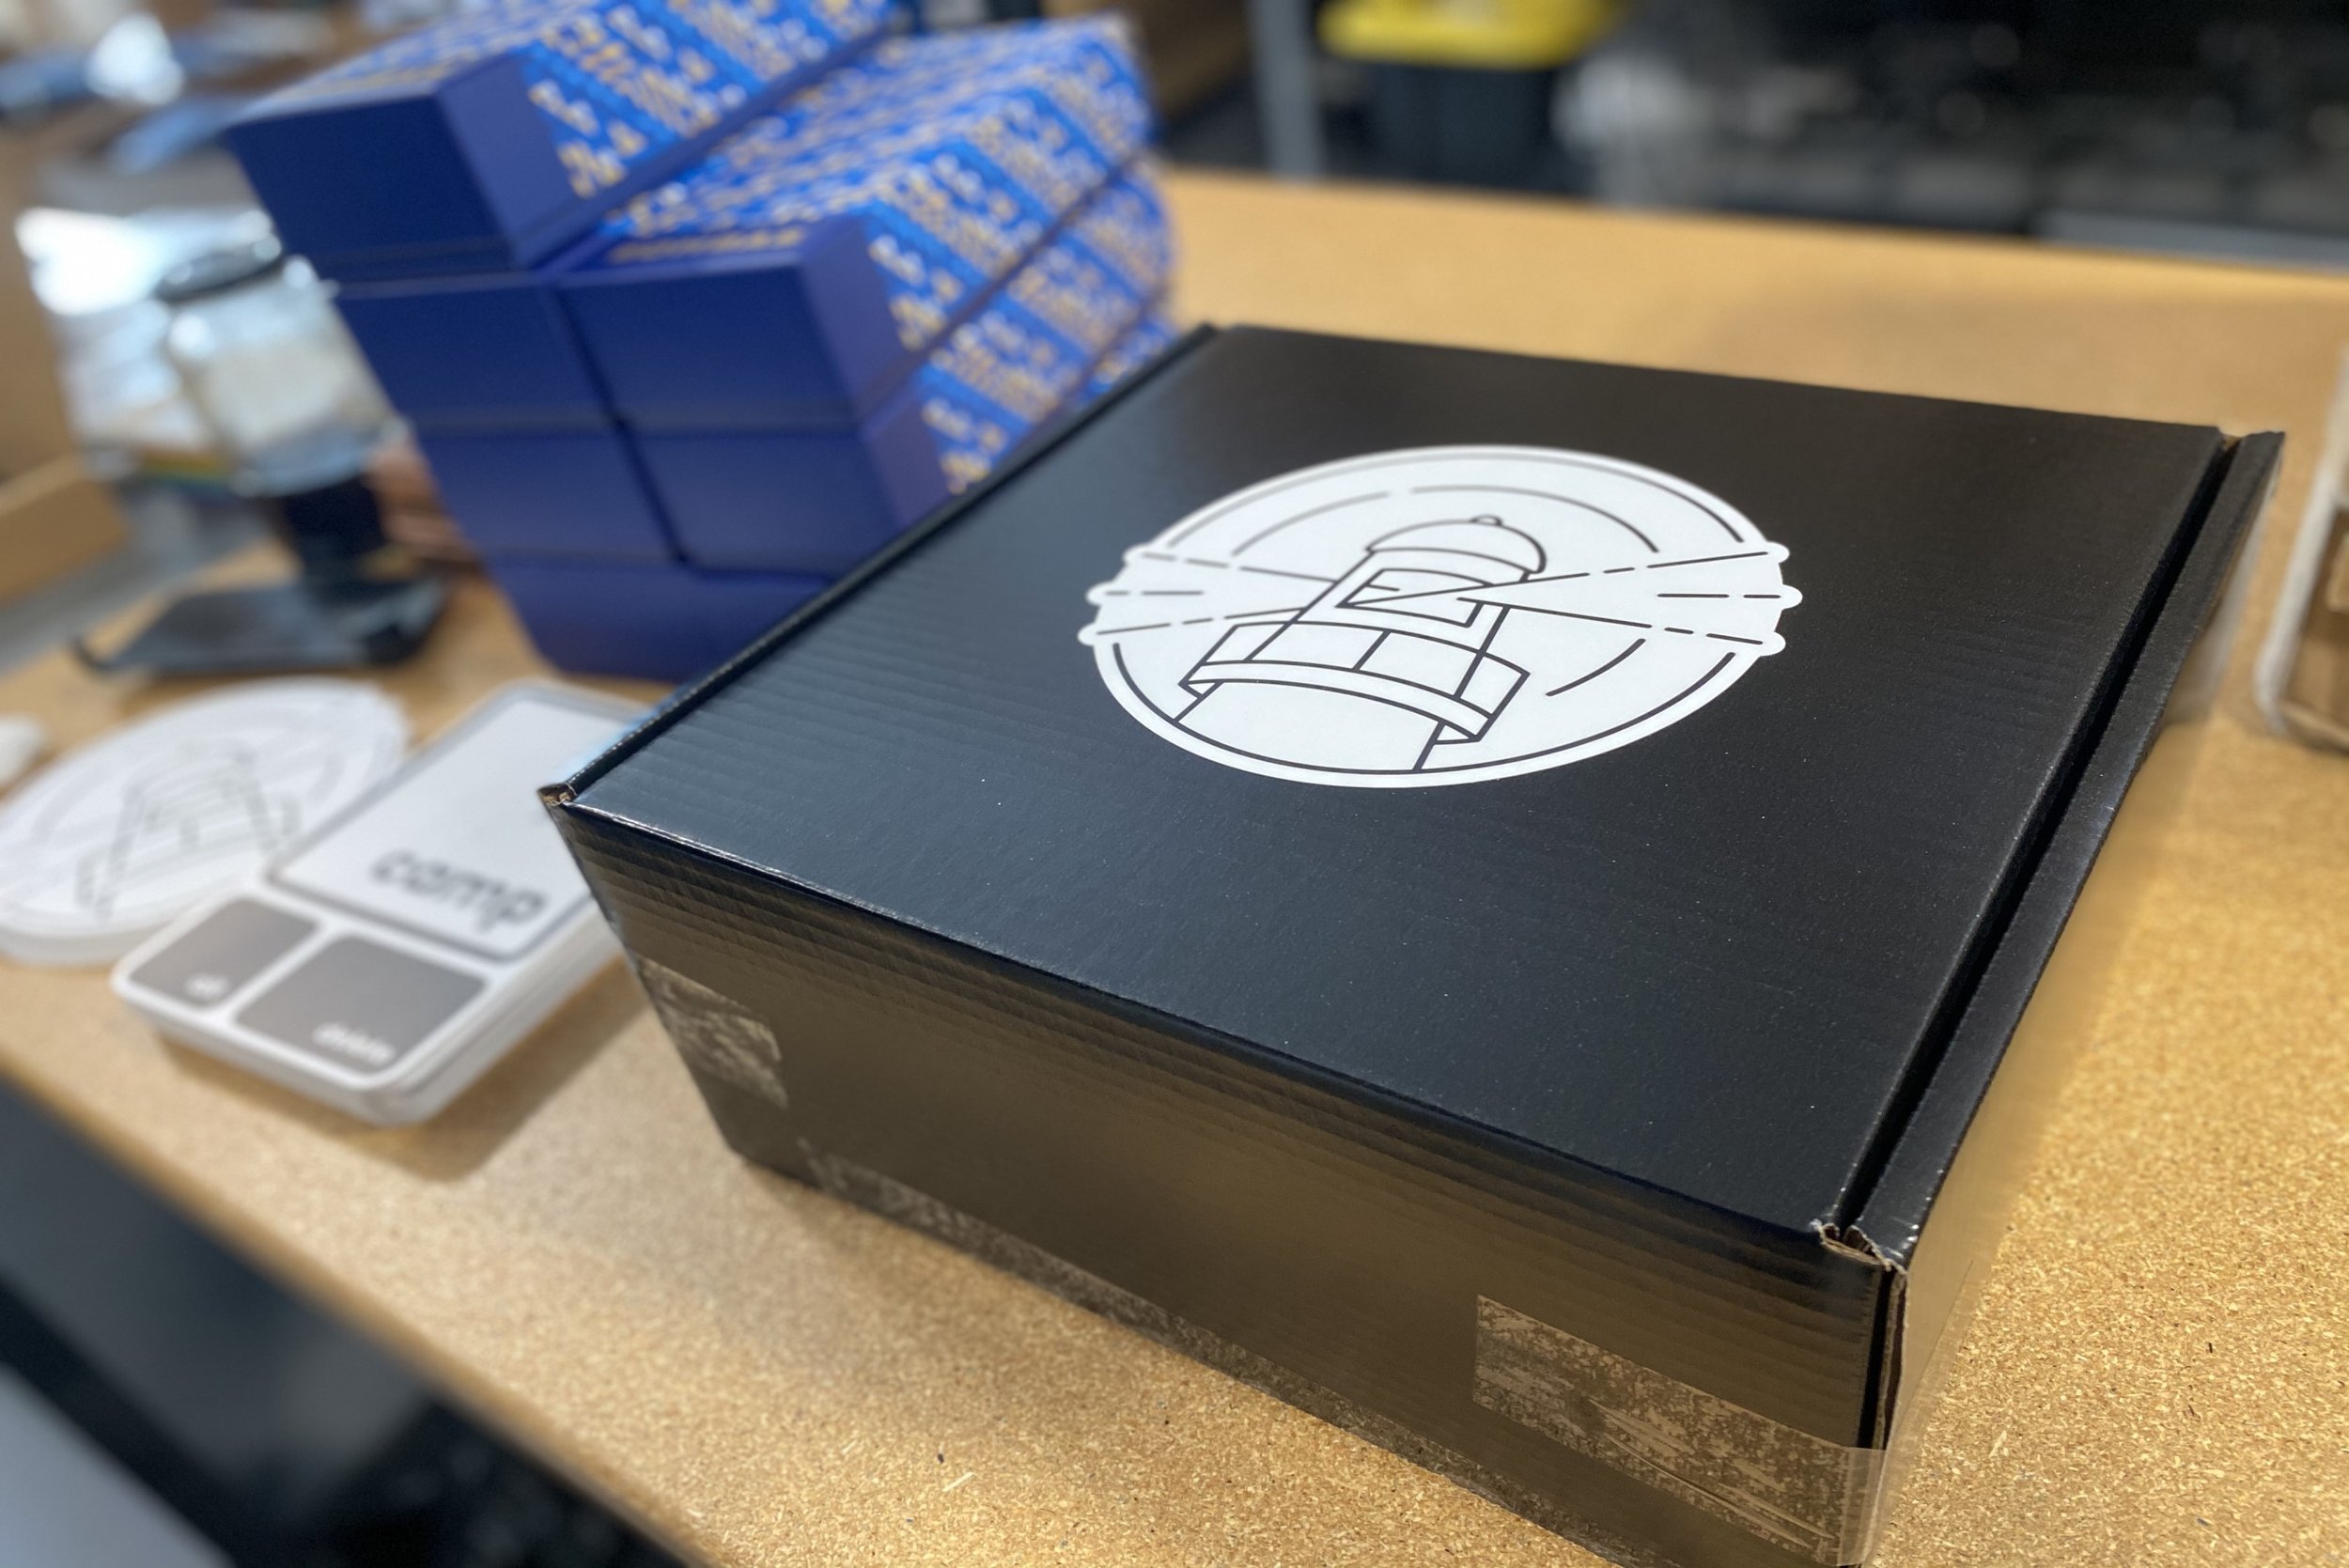
Custom Packing Labels

Packing labels are usually applied to a simple box where the product is stored. These custom box labels are great to display your branding such as logo, colors, and tag lines or your social media handles. It’s another easy and affordable way to personalize your packaging.


Pro Tip: Hire a product packaging designer


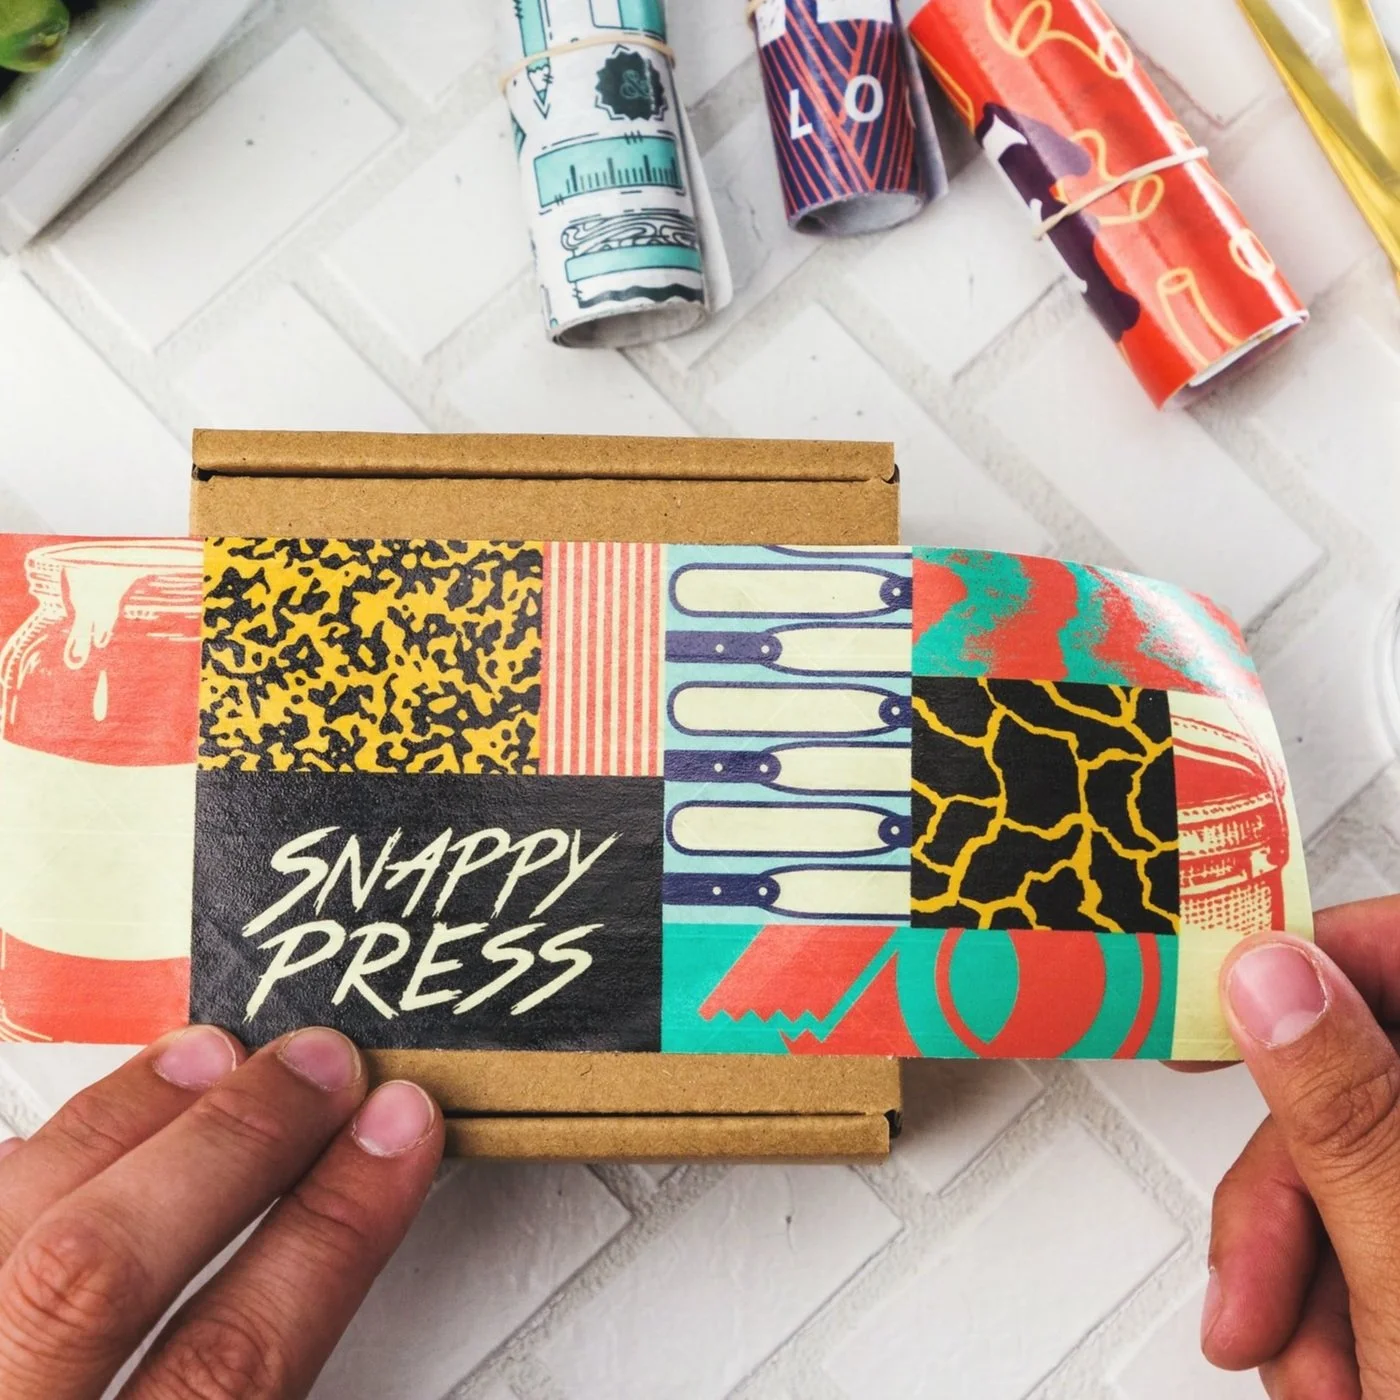
Custom Packing Sleeves

Packing sleeves are often used on small items that are packaged in small boxes where a sleeve can be placed. Besides the visual component, your branded packaging design should be functional. After all, it will hold your product securely in place during transit.
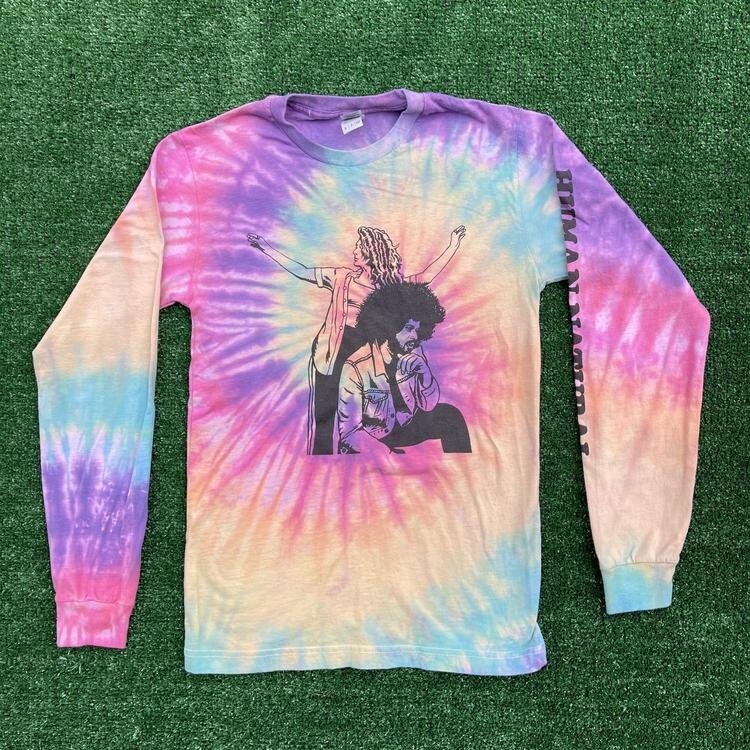


Custom Tissue Paper

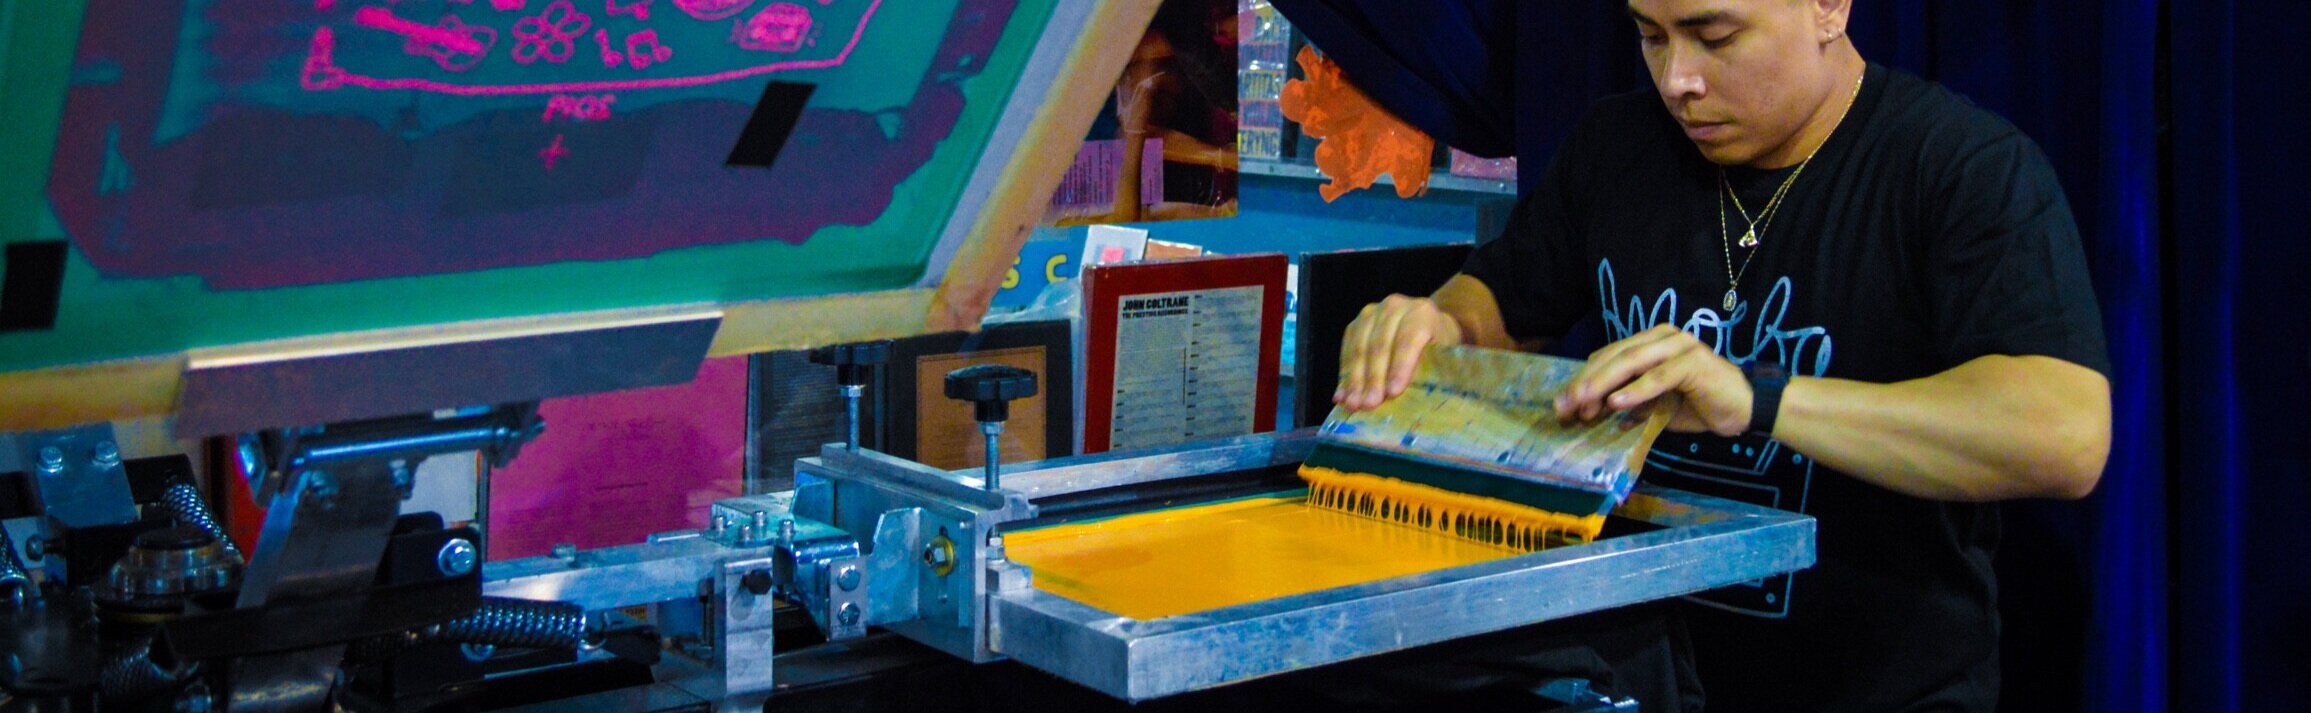
Customized tissue or packing paper is primarily used for apparel, however, it does not have to be! This option is again another way to keep your branding costs down. Tissue paper with your brand on it can be printed by your local merch printer or screen printer, or if you’re looking for a more DIY option, you can purchase a stamp of your logo and stamp the paper as you go!


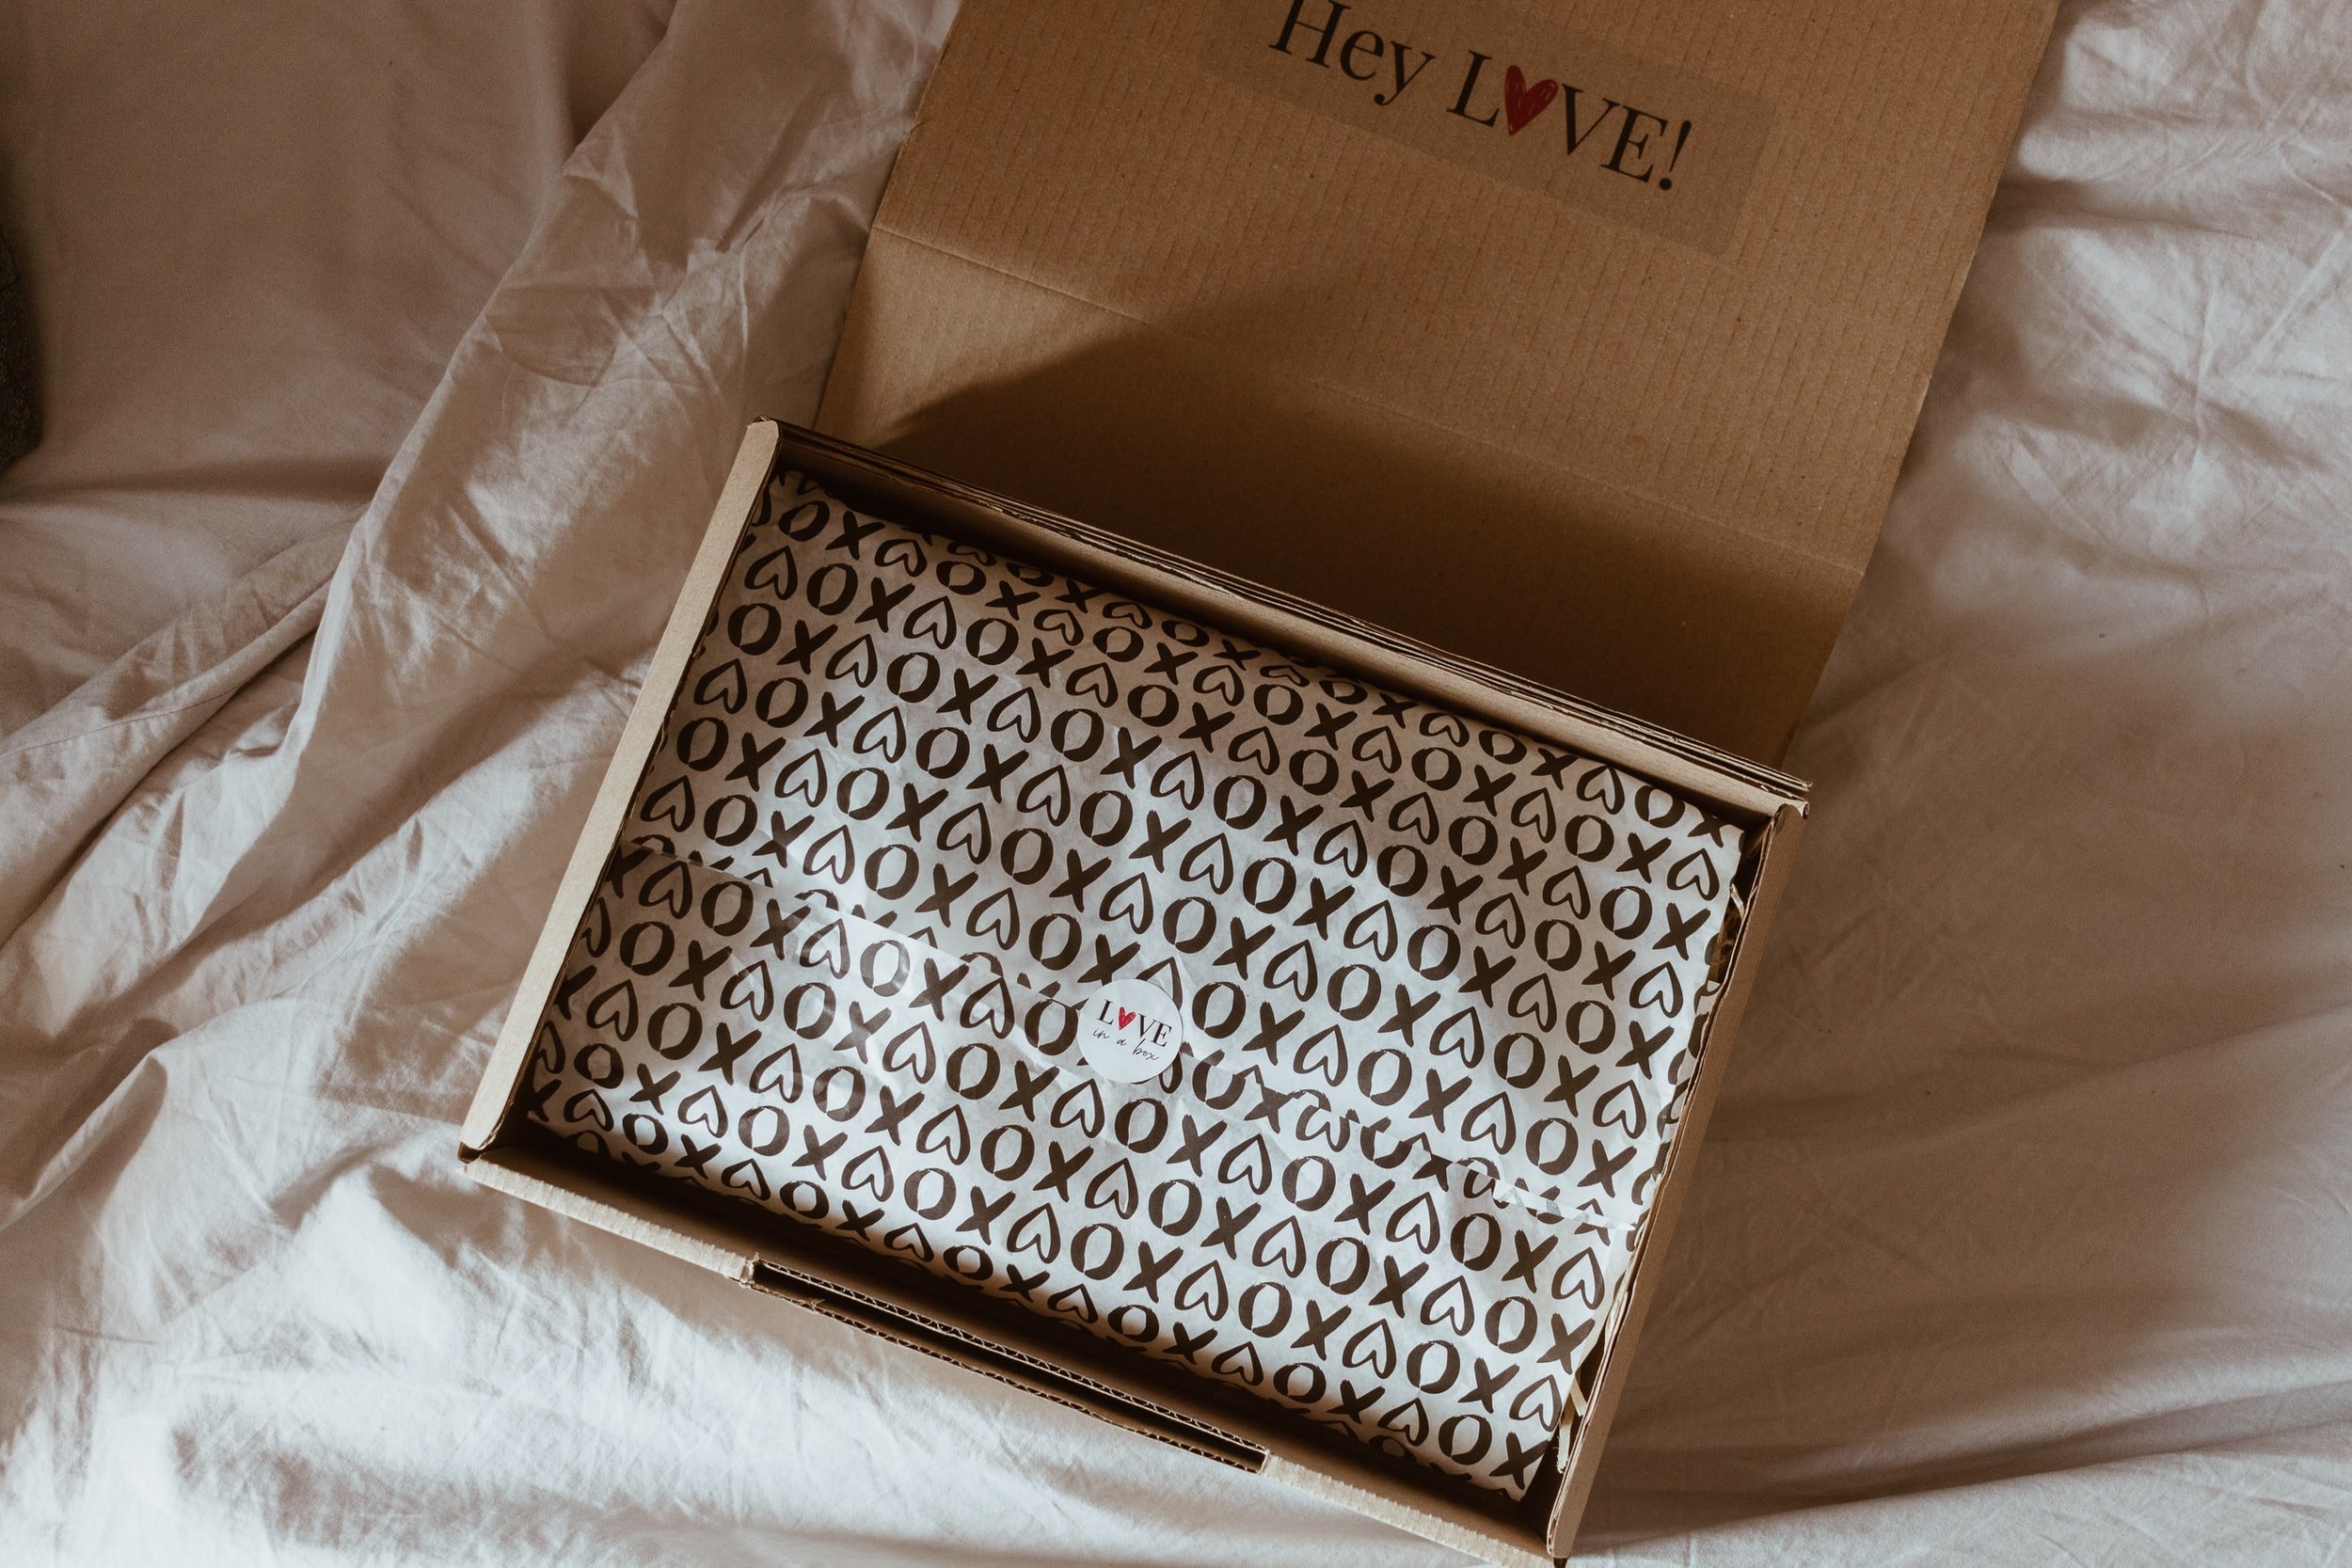
Custom Packing Inserts

Packing inserts compared to the top suggestions may cost a bit more depending on the type of paper (you will want to use a thick card) and the type of print such as gloss or matt. Insert cards give you a little more flexibility as to how much information about the brand you can include due to the size (assuming your box is big enough to fit an 4x6 card).

Adding a discount card can make for a wonderful surprise treat and are a great way to encourage repeat sales.

You can also add thank you notes and other personalized messages that allow them to inform, engage, and ultimately, build a relationship with their clients.

Author: Irene Floridia - Content Creator


Do you have more questions about packaging design and printing?

send us an e-mail at quotes@familyindustriesla.com, or give us a call at 323.227.1547 and we'd be happy to help.

Our showroom at 2755 Fruitdale Street, Los Angeles, CA 90039 is open by appointment only from 10 am - 4 pm Monday through Friday.


Follow us on Instagram and Facebook

For FAQ, check out our site!

For any inquiries, send us a message!

OR

send us an e-mail at quotes@familyindustriesla.com

Halloween Costume Ideas for 2023

+Woman+in+Skeleton+Costume.jpg

This year Halloween has the potential to be great, as the day falls on a Saturday, which means you can have a late night with the kids or with friends watching scary movies and eating way too much candy until you pass out from a sugar crash. While a lot of things are different this year, we can all still dress up and make it fun. We’ll take you through some simple and on-a-budget costume ideas to stay in the spirit even if there is no Halloween parade this year.

Costume Ideas

If you’re anything like us, every year you get caught off guard once this time of year arrives and you end up panicking trying to find a last-minute costume for a zoom Halloween party. Here are some ideas that you may find helpful in the search for that great costume that took little money, effort, and time to put together.

Custom T-Shirts make great DIY Halloween costumes

While not the most original idea, it’s the perfect last-minute choice and the cost is much less than a traditional costume. So, you will be saving money and time! a t-shirt costume is a simple and practical idea for a costume that, if dressed correctly, can be a big hit at the annual Halloween party. For 2020, especially, you will most likely spend the night at home but this doesn’t mean that you can’t have fun and dress up!

A few things to consider when coming up with a costume t-shirt:

  1. Humor - Always be funny! Do you like to make people laugh? find a way to still be funny with a simple t-shirt costume by

  2. Cleverness - A play on words is always a hit! a clever way of using a word or phrase will almost always get a chuckle from people.

  3. Originality - Make sure you’re the only one at the party with your costume, try to be creative and reference pop culture or current events.

  4. Relativity - There is nothing worse than having to explain the joke. Make sure your costume is something people will understand and relate to.

Here we will show you a few fun ideas that have all the elements needed for an awesome last-minute Halloween costume for your “chill-at-home Halloween party”.

nerd-t-shirt-costume.jpg

Nerd Tee

The classic nerd costume. We all have a pair of old thick framed glasses. Buy this shirt and put on the glasses and you’re good to go!

BUY
clever-t-shirt-costume.jpg

Clever Tee

Wittiness will always get you brownie points. Everyone likes a clever t-shirt!

BUY
magician-shirt-costume.jpg

Tuxedo Tee

This shirt tuxedo costume allows for some versatility. You could be a magician or a fancy man at a fancy dinner party. Grab a top hat and some dashing white gloves and you'll be ready.

BUY
farmer-t-shirt-costume.jpg

Hillbilly Tee

Barbed wire tattoos, flask in the pocket, corncob pipe, and a bandana. All you need is a mullet and a trucker hat and you’re good to go.

BUY
pregnant-halloween-costume.jpg

Pregnant Costume Tee

Have a bun in the oven? Most costume won’t fit? No problem! This t-shirt will scare all the little trick-or-treaters.

BUY
star-trek-shirt-costume.jpg

Star Trek Tee

Now this is an effortless cool costume! Throw this shirt on, slick back your hair and put on some black pants and you’re in with the trekkies at the Zoom party.

BUY


Costume Masks

As we continue to battle Covid-19, it is important to follow the CDC guidelines for this holiday. Wearing a mask will have to be part of your costume if you are taking your kids trick-or-treating, or if you’re an adult that still enjoys childhood traditions. Whatever the scenario, we decided to list some of our favorite Covid-19 friendly face masks for Halloween.

Fun Halloween Face Masks for 2020

ron-swanson-mask.jpg

Ron Swanson

Everyone loves the show Parks and Recreation, and Ron Swanson is an iconic character. Just put on a suit, slick back your hair and put on this mask!

Buy
kevin-home-alone-halloween-mask.jpg

Kevin - Home Alone

You can’t think of a more iconic movie from the 90’s. This scene from home alone printed on a mask is genius!

Buy
zombie-halloween-covid-mask.jpg

Zombie

The classic Halloween costume! get this mask and skip all the special effects makeup.

Buy
hocus-pocus-witch-face-mask.jpg

Hocus Pocus Witches

The best Disney Halloween movie ever made! The Sanderson sisters are the most iconic witches, and these face masks prove that!

Buy
led-face-mask.jpg

LED light-up Face Mask

If you’re going for a more futuristic look, this face mask is it! Some of the features are great and you can use it for multiple occasions.

Buy
the-plague-halloween-mask.jpg

Plague Doctor Mask

We couldn’t think of a better occasion to wear this than for Halloween during a pandemic. This steam punk mask is great for a simple costume idea.

Buy


Author: Irene Floridia - Content Creator

Different Types of Screen Printing Techniques

31A388A2-3469-40DF-B89A-9D7A12E8FFD8.jpg

Screen printing might sound like it’s a straightforward process but there are many print effects that can be achieved with the right technique. The different screen printing methods are used to create a specific look to fit with the style you’re looking for. In order to achieve certain looks, you may need to adjust your artwork file or overall design. Don’t worry, we will take you through those steps!

In this guide, you will find the best T-shirt printing methods explained, exploring how each method works, the process, and the end results. Each of these methods are widely used by screen print shops around the world.

About Screen Printing

IMG_8615-2+%281%29.jpg

Screen printing is one of the most popular, established, and widely used amongst print shops. The process involves using screens to apply ink to apparel and other various materials. Also known as silkscreen printing, screen printing is a versatile and effective printing method that allows you to produce T-shirts with outstanding quality and a tactile feel. And, because the inks are absorbed deeply into the fabric, it is possible to achieve vivid, bright colors and maximum durability.

This is one of the most traditional methods of T-shirt printing, with experts believing it dates back as far as ancient China. However, it became popular in the 20th century, when Andy Warhol used the technique to create his iconic Marilyn Monroe portrait. It has since been used to create flatstock such as band posters, art prints, and graphic tees.

What Is The Screen Printing Process?

screen-printing.jpg
  • Design Creation

    • Screenprint designs are often done using various software such as illustrator. You will want to ensure your file is in the right format before you begin creating your design. Size is very important and you will want to ensure the file can be re-sized according to the print surface.

  • File Formatting

    • Vector files are needed to create a perfect print. Vector files are mathematical calculations that create lines and figures on our monitors. Unlike working with pixels, you can expand or minimize these vectors as much as you want, without impacting the quality. As well as being saved as a vector, the artwork must also be separated, with each color on a different layer. This is because, in the screen printing process, each tone is printed using a different screen.

  • Screen Preparation

    • The screen needs to be coated with a photosensitive emulsion. This creates the green background you might have seen on a screen printing screen. This is a simple process but must be done carefully to ensure that the liquid is distributed evenly.
      For the photosensitive emulsion to work properly, it must be left to dry in a cool, darkroom. If the emulsion is exposed to light at the wrong time, it could jeopardize the full process.

  • Stencil Creation

    • Once the screen is dry, the design is placed on top of it and secured in place using an adhesive. The screen is then placed under a strong source of UV light. The parts of the screen that haven’t been covered with the design will harden, while the rest will remain soft. In effect, the design has now been burned into the emulsion. When the screen is fully dry, the design can be removed using a small brush and water. A negative component of the artwork will be left and the artwork is ready to be printed using the preferred ink and technique to achieve the right look.

  • Color Separation

    • If your design features more than one color, the process is repeated so that each color in your design is separated into individual layers on different screens. So, if your design has two colors, you’ll need two screens.

  • Application

    • Now that the screen is ready, it’s time to start the actual printing. The T-shirt will be placed in the screen printing machine, with the screen carefully placed on top. The ink will then be placed on top of the screen and evenly distributed across the surface using a squeegee.

Learn more about the life of a screen from The Metropolitan Museum of Art

What Are The Different Types of Screen Printing?

image.jpg

With screen printing, you can create different finishes such as crackle or glow in the dark, but there are also different techniques that can be done to create a specific look for your print. These different techniques are used when you have a specific look in mind or you’re looking for a specific or unique aesthetic.

Spot Color Screen Printing

Spot Color Screen Printing is the most common t-shirt printing method. It uses the stock color of the ink by printing it through the stencil of the screen. It produces a vibrant solid spot of color and creates a thicker layer of ink depending on the ink and mesh count used.

Being it is one of the most beneficial in printing darker garments. It is useful for printing 1 – 4 colors; when you have more spot colors, other printing methods such as the simulated process may be a good option.

Because spot colors layer an infinite amount of colors, they can provide a much more vibrant and detailed print. In addition to the variety of options, spot colors provide much better consistency from print to print. When printing a solid color with process inks, there may be slight variations in the color balance that can affect the color’s consistency. While spot colors may cost a bit more, they can add a lot to your project making the extra cost well worth it in the end. Check “How To Screen Print: Spot Color”.

Halftone Printing

Halftone prints are single or multiple colors in which gradients are printed. These tones can range from solid spots to halftones of the same color. This screen printing method is excellent when you want to achieve the look of multi-color printing without actually doing it. This screen printing method emphasizes the use of shading with tiny dots, pictures can be printed using halftone screen printing and only use one single color to do so.

For example, if you want to get a pink radiant color on your white t-shirt, you can print red on a white shirt and include a 50% gradient. The 50% gradient will mix with the white to give it a pink appearance, all using only one screen and one color. It improves the graphics quality and produces a softer feeling print when printed directly onto the garment. Check “How To Get Started Screen Printing with Halftones”.

Grayscale Printing

Greyscale printing is a great way to print full-color images as one-color grayscales or halftones. Full-color photographs can be printed as a one-color halftone. Full-color drawings containing a complete range of different colors may also be produced employing a one-color halftone.

Typically it’s done in black ink on a light garment, but technically speaking, it can be done in any color ink as desired. The resolution will depend on the lines per inch used in the dot pattern.

The more dots a halftone has, the more detailed the print will look. It is a great cost-effective screen printing technique to print black and white photographs on garments. Watch “Convert a full color image to grayscale for screen printing using halftones”.

HOW IS HALFTONE PRINTING DIFFERENT THAN A GRAYSCALE?

Halftone printing is different than grayscale printing for several reasons. The first is the fact that halftone printing involves using one color to create various shades and portray the desired image as a result. Grayscale printing, on the other hand, is the specific use of gray shades from black and white.

Duotone Printing

Duotone printing, also known as multitone printing, is the combination of two halftones for the same image printed with two colors. First, a black halftone is printed on white tees, and then a second halftone will be printed with color ink.

The color halftone combines with the black halftone to produce a duotone color hue. It gives a retro and cooling effect to the prints on light-color garments and gives a full-color print appearance but at a much less expensive rate. It also produces a softer feel print when printed onto the garment.

This process requires that the press be set up with special inks, usually PANTONE-designated colors, instead of the standard CMYK inks used for process color printing. Check out “Creating and Separating Duotone Images”.

CMYK Printing

CMYK is the oldest, color reproduction, print method. Using cyan, magenta, yellow and black ink, screen printers can print designs on white or light-colored garments. For users skilled in CMYK file preparation, Photoshop, and screen creation, this is still a viable print process for light-colored garments.

CMYK printing is the most complex of all screen printing techniques and should be done on an automatic press. It can be done manually, but for optimum results, you need an automatic t-shirt press.

The printing process combines the above four colors to recreate the original image’s full tonal and color range. Moreover, it is an expensive process. Additionally, CMYK is implemented less because simulated printing is more dominant. Watch “How To Screen Print T-Shirts in CMYK”.

Simulated Process Printing

A simulated printing process is a method used to reproduce almost any image on the market. It does so by overlapping and blending colors in a method similar to CMYK through using halftones and spot colors and/or PMS colors. Essentially, it's a way of taking an image that historically would have been printed via CMYK but instead uses more opaque ink to create a more stable color and production-friendly ink that can print almost any design for any garment.

Moreover, it is most often the process used to print complex images on black-colored garments. Designs that are too difficult to separate in a vector program, raster images, photographs, complex tonal illustrations, are all doable with Simulated Process. Watch “How to Screen Print: Simulated Process”.

Learn more about the different screen printing methods “CMYK vs. Spot Color vs. Simulated Process Printing”.

Author: Irene Floridia - Content Creator


Share This Article:

Follow us on Instagram and Facebook!

For FAQ, check out our site!

For any inquiries, send us a message!

OR

send us an e-mail at quotes@familyindustriesla.com

Our showroom at 2755 Fruitdale Street, Los Angeles, CA 90039 is open by appointment only from 10 am - 4 pm Monday through Friday.

A Guide To Streetwear Design

image.jpg

Designing artwork for a t-shirt or a hat may seem like a simple task, but when it comes to the technical application of the design; things may get complicated. The road to starting your own streetwear brand does not have to be bumpy! we encourage you to inform yourself before investing time and money, and we will help you by taking you through the different steps to consider when creating and designing your own apparel brand.

In this article, we will walk you through efficient and economical ways to begin a streetwear clothing line as well as the technical part of apparel printing to help you avoid having to re-design your logo or any other artwork you would like to print on t-shirts, hats, or pants.

Photo and T-Shirt Design By NEVER MADE

Photo and T-Shirt Design By NEVER MADE

What Is Streetwear?

Streetwear is a casual fashion style that became popular in the 1990s. It includes comfortable yet trendy clothing such as graphic tees, hoodies, sweatpants, and sneakers. Streetwear brands are inspired by both hip-hop culture and skater style. Followers of the latest trends in streetwear are known as hypebeasts, and many go to great lengths to acquire limited-edition designer hats, hoodies, sneakers, and more.

The first streetwear brands emerged in Southern California in the 1980s, when surfers sold screen printed T-shirts to promote their hand-shaped surfboards. Inspired by the street style of LA skateboarders and surfers as well as hip-hop fashion, small skateboarding shops in NYC started creating their own designs in the 1990s.

In the 2000s, sneaker culture influenced streetwear fashion. Hypebeasts paired their graphic tees with athletic sneakers, and collaborations flourished.

In the 2010s, luxury streetwear was born. As young people and social influencers made streetwear an important part of pop culture, and the fashion industry noticed, from mainstream sportswear brands to high fashion brands, got in on the action.

The Basics

image.jpg

Comfort

As mentioned, streetwear takes inspiration from the hip-hop culture as well as the skater style. When figuring out the fit of your apparel, you will first want to think about whether you’re looking to design loose and comfortable pieces or have more of a tapered look.

Streetwear is generally defined by breaking the rules of proportion by using oversize t-shirts with skinny jeans or dropped-crotch sweatpants, but as the style evolves, it is encouraged to just make cool and interesting apparel regardless of fit.

Ripped pants and distressed jeans are also part of the streetwear style, these details are important to the overall look. Considering what type of fit and style gives you brand identity and consolidates your audience to a specific group, which in turn, will help you narrow down your marketing efforts in the future.

Fabrics & Design

Because t-shirts are one in a million, and cool graphics are being designed and printed daily; good high-quality fabrics will set you apart from the competition and give your brand an edge. If this is something you can afford, we highly recommend going with higher quality cotton.

Cotton fabrics are premium options and ideal for long-lasting apparel. Additionally, the thicker the fabric, the better the graphics will be. The thicker fabric allows for a cleaner and nicer print, whether you’re screen printing the design or opting for a DTG print (direct to garment), a nice cotton blend is what you will need.

The design will depend on what your brand is about. Considering the name and the inspiration behind your brand as well as finding a compelling way to translate your passion for the brand into a cool graphic is key, and that same sentiment should show throughout each article of clothing and each collection thereafter.

We recommend that you stick to one logo and that logo be visible enough on all articles of clothing offered by your brand. The graphic design should be easy to read and recognizable. When designing the graphics, seek inspiration from your life, your surroundings, or the culture within your community. Having a design that directly connects to a certain lifestyle is what makes a streetwear brand successful.

Versatility

When creating your own apparel brand, especially in the streetwear category, you want each piece to be versatile. Versatility means that you can wear that article of clothing with many other pieces to allow the buyer to create their own unique look and keep their originality.

You can achieve versatility by including basic colors such as white, black, or grey. Minimal designs such as your logo embroidered small on the chest or your logo screen printed on the back of a t-shirt.

The Details

Accessories are essential to completing a look. There are simple accessories you can offer, such as hats, beanies, and bandanas to complete a unique outfit.

Screen printing a hat or a bandana is fairly easy and affordable, and are a good way to add accessories to your clothing line. Additionally, embroidering a logo on a hat or a cross-body bag is a good alternative that provides an added touch of customization and quality.

Focusing on the smaller details can make all of the difference in setting your brand apart from others, such as printing on unconventional spots like the sleeves or adding an embroidered element to the design.

image.jpg
image.jpg

Screen Print or Direct To Garment?

There are many differences and similarities between these two methods of printing, and there are a number of criteria to be taken into consideration when making your decision. The following points will help you decide on which print method is better for your brand and more specifically what type of print method is best for your designs such as logo and other artwork you wish to display on the apparel.


  1. Quantity: Digital printing allows for a smaller quantity to be printed while screen printing will usually require a minimum.

  2. Apparel: Screen printing has more versatility when choosing your fabric. For digital printing, it is advised to print on 100% cotton or other select cotton blends and only certain colors.

  3. Design: Photographs or hyper-detailed images with a lot of colors are usually better printed digitally. However, if you have a large number of shirts you would like to print, screen printing may still be an option but it may cost you a little bit more or may require some adapting to make the design work best.


If cost is your main concern, the following criteria will dictate the best print method:

  1. Apparel: The type of apparel can range from value to premium options and depends on the style and brand.

  2. Print Locations: There is the option for 1 or 2 locations, which would be the front and/or the back (for a t-shirt or sweatshirt).

  3. Fabric Color: For screen printing on darker color fabrics, a white layer before your print is necessary and may cost a little bit more.

  4. Number of Colors: The more colors your print requires the higher the cost is for screen printing, however, if you have a large quantity, this cost may be a lot lower as you can have access to deeper discounts.

  5. Quantity: With screen printing, the number of pieces will dictate the majority of your cost. This is the most important factor that will most likely dictate the right method for you.


Streetwear Brand Spotlight:

Never Made is a Los Angeles based streetwear / lifestyle brand created by artist Francisco Reyes, Jr.

Never Made is a Los Angeles based streetwear / lifestyle brand created by artist Francisco Reyes, Jr.


Remember!

When people look at you as a “high-quality” streetwear brand, you’ll not only be able to charge more money, but you’ll be much more reputable in the process. Reputation can take you a long way in the fashion industry, especially when it comes to something as urban as streetwear.

Author: Irene Floridia - Content Creator


Follow us on Instagram and Facebook!

For FAQ, check out our site!

For any inquiries, send us a message!

OR

send us an e-mail at quotes@familyindustriesla.com

Our showroom at 2755 Fruitdale Street, Los Angeles, CA 90039 is open by appointment only from 10 am - 4 pm Monday through Friday.

How To Tie Dye: A Guide in Techniques

unsplash-image-CH0Rho6deI8.jpg

Summer is almost here and with 90’s fashion becoming more popular among TikTok’s Gen Zs’ creators, tie-dye is all the rage. If you’re like us and love to scroll on TikTok for hours, you’ve probably come across a couple of tutorials on how to get the perfect tie-dye t-shirt or even sneakers! In this post we’ll take you through the different techniques to get the right result for what you’re trying to achieve.

How To Tie-Dye

We’ll show you different tie-dye techniques on this article that show you how to tie dye like a pro, but here are some tie-dye basics to help set you up for success! Whether you are wondering how to tie dye a T-shirt, how to dye socks or pretty much anything else, here are the basics to get you started.

Supply List:

  • Plastic Gloves

  • Rubber Bands

  • Easy-squeeze bottles with dye powder

  • Sealable plastic bad or wrap (for storing your t-shirt while the dye sets)

  • Disposable surface cover (like a large trash bag)

  • Wire Rack (to avoid your creating from sitting in a pool of dye)


Step 1: Pick your Item

There’s a long list of items you can tie dye, from t-shirts, socks, and sweats to bed sheets, or even shoes! We advise your select an item that is made from 100% natural fibers such as cotton, rayon, or silk. Synthetic fibers like polyester have different fibers that are not as absorbent and this can prevent the dye from dying your items completely.

It is recommended that you wash the item before starting the tie-dying process, especially if the item is new. Some dyes will require you to presoak the fabric in soda ash but with products such as Tulip’s One-Step Dyes, which already has the soda ash mixed into it.

Pro Tip: Do not use fabric softener when pre-washing your fabric. The chemicals in fabric softeners can block dye absorption.


Step 2: Prep the Dye

Some products such as Tulip’s One-Step Dye bottles already have the powder inside, but if you’re using another type of dye, now is the time to set up. Put the powder inside of your easy-squeeze bottles, then add tap water, ensure your nozzle is tightly screwed in and that the cap is on. Shape each bottle thoroughly until the dye powder has dissolved. Wait to mix your dyes until you are ready to apply them.

Pro Tip: Dye left in bottles for more than 72 hours might lose their concentration and may not appear as vibrant after dying.


Step 3: Bind the Item

Lay your damp item or t-shirt out onto a flat surface, make sure the surface has been covered with plastic. We’ll use a t-shirt and the spiral technique as an example, you will find the center of the tee which would be down the middle of the collar, and the section directly under the sleeves. That is your center point for your spiral.

Pinch the fabric in the center and twist the fabric towards the right until the entire shirt is bunched, making a perfect swirl. Use rubber bands to hold the spiraled t-shirt in place by crisscrossing them and creating 6 wedge shapes.


Step 4: Apply the Dye

Using the metal rack, place the t-shirt on to it above a covered surface to avoid making a mess. Wearing your gloves, proceed to apply the dye colors to each wedge created by the rubber bands. Turn the t-shirt and apply the same colors on the back to match the same colors as the other side.

Pro Tip: There’s no wrong way to tie-dye!


Step 5: Let Set

This is the longest step because you will need to let your creation sit for many hours. Place your project into a sealable plastic bag or plastic wrap to keep it damp and let the dye settle. Let your project sit 6 to 8 hours or overnight if you would like to give it some extra time. It’s important for the fabric stays damp while the dye sets, so make sure it’s stored in a cool area.


Step 6: Rinse and Wash

After it has been at least 6 hours and the dye has fully processed, remove the rubber bands and rinse, wash and dry. We recommend you air dry it or follow the instructions on the t-shirt tag.


7 Best Tie-Dye Techniques & Patterns

IMG_8984.jpg

Besides this being a fun activity to do with your kids or your friends over some beers, it can also be highly technical with many steps, that if missed, can throw off your design completely.


spire-tie-dye-shirt.jpg

The Spiral Tie Dye Pattern

This technique is one of the most commonly used and if you’re just getting started this is a good introduction to tie-dying. This technique is simple, pinch the center of the fabric and twist to create folds and then tie with rubber bands strategically then add the dye.


bleach-tie-dye-hoodie.jpg

The Reverse Techniques (a.k.a Bleach Tie Dye)

This technique is called reverse or bleach because you’ll need a 100% cotton black fabric and bleach. For this technique, you’ll need to leave your shirt dry and crumple into a tight mound with the rubber bands. There’s no specific pattern to follow, this method is a little looser. Then, mix the bleach in an easy-squeeze bottle to then apply to your fabric. Rotate the fabric as needed while squeezing the bleach into it. Watch as the bleach begins to strip the color of the fabric and gradually remove the rubber bands to then immediately rinse and wash according to instructions.

Once the fabric has been washed, leave it damp and lay it flat on your workstation which should be covered with plastic to avoid making a mess. Then apply the chosen dye colors randomly over the fabric, especially in the lightened sections that were created from the bleach. Once done, put the fabric into a resealable plastic bag and leave it in a cool dry place for 6 to 8 hours. Then rinse and dry.

Shibori-Tie-Dye-shirt.jpeg

The Shibori Tie Dye Pattern

This technique is all in the way the fabric is folded. For this technique, we will use a t-shirt as an example. Accordion fold the t-shirt from the bottom edge up towards the collar of the shirt in even folds. Once folded up, starting on the end of the folded shirt, accordion fold it again towards the opposite direction until you reach the other end. Wrap the rubber bands tightly around the folded shirt in each direction, crisscrossing the rubber bands.

Place the folded t-shirt on the rack and begin to squeeze the dye into the fabric on each side. For this technique, indigo blue color dye is usually used. Place the shirt in a sealable plastic bag for 6 to 8 hours or overnight. Once the dye is fully processed, cut away the rubber bands and rinse, wash and dry according to your instruction guide.

ice-dye-tie-dye.jpg

The Ice Dye Technique

This technique requires literal ice. The pattern from this technique is very recognizable as it’s one of the most popular. The first step is to damp your fabric in soda ash or the Tulip One-Step tie-dye, then lay your damp fabric out flat on your covered work surface. For this technique, the crumple tie-dye pattern is the most commonly used and worst great, but you can experiment with other patterns you want. After using the rubber bands to bind the fabric, place it on a rack (over a bucket or a bowl is recommended to catch the dye as the ice melts). Then cover the fabric with ice, make sure all of it is covered, the more the better.

After covering the project in ice, sprinkle the dye powder randomly over the ice. The ice will melt and help the dye absorb into the fabric. Depending on where you live and the weather temperature, it could take a while for the ice to melt or not much time at all. If the ice melts quickly, you can then place your project into a sealable bag and allow the dye to set for 6 to 8 hours. If it takes about this long for the ice to melt, it’s time to skip the bag and move on to the next tie-dye step which is rinsing and drying.

spider-tie-dye.jpg

The Spider Tie Dye Pattern

For this technique, you will start with a damp fabric and then fold it in half. Pinch the fabric where you would like the center of the spiral to be, then twist until the entire fabric is spiraled. Bind the spiral with three intersecting rubber bands to create six wedge shapes. Apply a different color of dye onto each wedge shape and then carefully flip spiral over and apply the same colors on that side.

Apply black dye to one side of the spiral, completely covering the other colors. Cover with a plastic wrap to keep damp and let it sit for 6 to 8 hours. Then rinse thoroughly and wash separately.

Kaleidoscope-tie-dye.jpeg

The Kaleidoscope Technique

For this kaleidoscope pattern, you will start with a damp fabric and fold it in half, if using a t-shirt, fold it in half lengthwise and press flat on a tabletop. Pinch the fabric where you would like the center of your first spiral to be, then twist the fabric a few times to create a small spiral.

Maintain the first spiral while pinching another section of the fabric and twist several times to create a second spiral. Then crumble the remaining fabric towards the spirals. Bind the fabric with rubber bands to hold securely. Then make a paper ring to fit around the bound fabric and this will help keep the ice in place when dying.

Instead of adding water to dye bottles to mix, squeeze dye powder of a few colors on top of the ice, then let the ice melt and remove the paper ring. Flip the shirt over and repeat the process on the backside with additional dye powders. Once the backside has been dyed, cut off the rubber bands, then launder according to instructions.

Firecracker-tie-dye.jpeg

The Firecracker Pattern

Scrunch damp fabric into a tube shape and wrap a rubber band around it at about a third of the way down from the top. Repeat on the bottom third. Add the dye to the top third of the fabric above the rubber bands. Then add Blue dye onto the bottom third of the fabric below the rubber band. Then wrap with plastic and let sit, then rinse and wash accordingly.


Dip-Dye-tie-dye.jpg

The Dip-Dye

Dip-dye (also known as tip dyeing) is a technique that involves dipping the ends of the fabric into dye. Dampen the fabric in preparation for dying then mix the dye of your choice and pour into separate plastic bins of bowls. Dip one side of the fabric into the first color, then squeeze out any excess dye back into the container. Dip the other side of the fabric into the second dye color making sure both dyes don’t touch. Lay the fabric flat on a rack and cover it in plastic wrap. Then let it sit for 6 to 8 hours. Rinse, wash, and dry.


Brand Spotlight:

LXIX Apparel

LXIX-APPAREL.jpg
IMG_5614_750x.jpg

While we at Family Industries do not do this type of customization, we have done projects with tie-dye by having help from LXIX Apparel which is a tie-dye haus located in Los Angeles and run by Brian Robert Jones, who is the guitarist for the band Vampire Weekend.

LXIX Apparel focuses on creating vibrant tie-dyed apparel from hoodies, and t-shirt, to full sweatsuits. LXIX has helped us with projects for Urban Farms LA and we have printed for their own brand as well.

IMG_3690_750x.jpg
IMG_3944_750x.jpg

Author: Irene Floridia - Content Creator


Follow us on Instagram and Facebook!

For FAQ, check out our site!

For any inquiries, send us a message!

OR

send us an e-mail at quotes@familyindustriesla.com

Our showroom at 2755 Fruitdale Street, Los Angeles, CA 90039 is open by appointment only from 10 am - 4 pm Monday through Friday.